Gaming on a PC is an exhilarating experience, offering unparalleled fidelity and frame rates. Yet, it’s a journey often fraught with invisible dragons: the dreaded Performance, Graphics, and Technical Issues that can turn a smooth raid into a stuttering mess or a high-fidelity epic into a blurry nightmare. Whether you're battling sudden FPS drops, baffling crashes, or perplexing visual glitches, navigating these challenges is key to maintaining your sanity and maximizing your gaming enjoyment.
This isn't just a troubleshooting guide; it's your expert companion, designed to empower you with the knowledge to diagnose, fix, and even prevent the most common frustrations plaguing PC gamers. We’ll dive deep into the heart of your machine, from optimizing graphics settings to wrangling stubborn drivers and ensuring your hardware plays nicely together.
At a Glance: Your PC Gaming Lifelines
- FPS Drops & Stuttering? Close background apps, update GPU drivers, check for overheating (GPU >85°C, CPU >75°C), and dial down demanding graphics settings.
- Lag on High-End Hardware? Scan for malware, ensure game/driver optimization, and use tools like GeForce Experience for quick tweaks.
- Random PC Shutdowns? Investigate your Power Supply Unit (PSU) for adequate wattage, monitor system temperatures, and test your RAM.
- Blue Screen of Death (BSOD)? Update all drivers, run hardware diagnostics, and consider a Windows reinstallation if all else fails.
- Game Keeps Crashing? Verify game files, close background apps, and ensure all software is up-to-date.
- No Display on Monitor? Check all cables, reset your BIOS (CMOS battery), and test your GPU for failure.
- GPU Acting Up? Look for visual artifacts, excessive fan noise, or sudden performance drops. Manage temps, keep drivers current (use DDU for clean installs!), and ensure your PSU can handle the load.
- Benchmark Your Rig: Use tools like 3DMark or FurMark to test raw performance and pinpoint bottlenecks, but don't forget real-world game testing.
- Overclocking Risks: While tempting, it can shorten GPU lifespan and void warranties. Proceed with caution and robust cooling.
The Common Culprits: Performance Glitches That Grind Gears
Nothing sours a gaming session faster than unexpected hiccups. Here’s how to identify and tackle the most frequent performance challenges.
When Every Frame Counts: FPS Drops and Stuttering
Imagine sprinting through a battlefield, then suddenly feeling like you're wading through molasses. That’s FPS (Frames Per Second) drops and stuttering – intermittent pauses or significant slowdowns that ruin immersion and competitive edge.
What Causes Them?
Often, these issues stem from your system being overwhelmed. Common culprits include:
- Background Applications: Too many apps running simultaneously devour CPU, RAM, and even GPU resources.
- Outdated Drivers: Your GPU's drivers are its instruction manual; old instructions can lead to inefficiency.
- Overheating Hardware: Components like your CPU and GPU throttle their performance to prevent damage when they get too hot. Think of it as your PC taking a forced cool-down break.
- Overly Ambitious Graphics Settings: Pushing your graphics beyond your hardware's capabilities is a surefire way to induce lag.
The Fixes:
- Declutter Your Background: Hit
Ctrl + Shift + Escto open Task Manager. Look for resource-hungry applications you don't need during gaming and close them. Even seemingly innocuous apps can quietly hog resources. - Update Your GPU Drivers: This is non-negotiable. Always download the latest drivers directly from NVIDIA's or AMD's official websites. These updates frequently include performance optimizations for new games and bug fixes.
- Monitor Your Temperatures: Tools like MSI Afterburner or HWMonitor are your friends here. If your GPU consistently hovers above 85°C or your CPU above 75°C during gaming, you have an overheating problem. This usually means your cooling solution isn't up to snuff or your PC is filled with dust.
- Action: Clean out your PC (especially heatsinks and fans) with compressed air. Consider upgrading your CPU cooler or case fans for better airflow. For those wondering about comprehensive thermal management, check out our ultimate guide to PC cooling solutions.
- Dial Back Graphics Settings: This is often the quickest way to regain frames.
- Resolution: Lowering this (e.g., from 1440p to 1080p) offers a massive FPS boost but reduces visual sharpness. It’s a trade-off many competitive gamers make.
- Texture Quality: High textures demand a lot of VRAM (your GPU's dedicated memory). If your GPU has limited VRAM (e.g., 4GB or 6GB), lowering this can help significantly.
- Shadow and Lighting Effects: These are notorious resource hogs, especially advanced features like ray tracing. Reducing their quality or disabling them entirely can free up substantial performance.
- Anti-Aliasing (AA): While AA makes jagged edges smoother, it comes at a performance cost. Experiment with different AA methods (FXAA, TAA, MSAA) or lower their intensity.
High-End Rig, Low-End Performance: When Expectations Don't Match Reality
You've invested in a beast of a machine, but games still feel sluggish. This is particularly frustrating because you know your hardware should be crushing it.
Why Is This Happening?
Sometimes, the problem isn't raw power but what's interfering with it.
- Bloatware or Malware: Unwanted software can silently consume resources or introduce system instability.
- Poorly Optimized Games: Not every game is a technical masterpiece. Some titles are simply poorly optimized at launch and require patches.
- Incompatible Settings or Software Conflicts: Sometimes, a specific setting or another piece of software clashes with your game, leading to underperformance.
Your Action Plan:
- Run a Deep Scan: Use reputable antivirus/antimalware software (Windows Defender, Malwarebytes) to scan your system thoroughly. Get rid of anything suspicious.
- Check Game and Community Resources: Before tearing your hair out, search online forums (Reddit, official game forums) for "[Game Name] poor performance" or "[Game Name] optimization tips." You might find common issues, recommended settings, or crucial patches.
- Optimize with Helper Software: Tools like NVIDIA GeForce Experience or AMD Radeon Software can automatically suggest optimized settings for your games based on your hardware. While not always perfect, they're a good starting point. You might also find value in understanding how monitor refresh rates impact perceived smoothness.
When the System Fights Back: Stability and Hardware Woes
Performance is one thing, but outright system instability is a whole new level of frustration. These issues can range from sudden shutdowns to the dreaded Blue Screen.
The Unceremonious Shutdown: PC Randomly Dying or Restarting
Picture this: mid-boss fight, and your PC just... blinks out. No warning, just silence.
Root Causes:
This often points to a critical hardware issue, usually related to power or heat.
- Power Supply Unit (PSU) Problems: An insufficient or failing PSU struggles to deliver stable power, especially under gaming load. This is a classic symptom of a PSU struggling to keep up.
- Catastrophic Overheating: While throttling handles mild overheating, extreme temperatures can trigger an emergency shutdown to prevent permanent damage.
- Faulty RAM: Corrupt or unstable RAM can lead to unpredictable system behavior, including restarts.
How to Stabilize Your System:
- Inspect Your PSU: First, ensure your PSU has enough wattage for your entire system, especially if you've recently upgraded your GPU or CPU. A modern gaming rig with, say, an RTX 4070, might need at least a 650W PSU. Ensure all power cables (especially to the motherboard and GPU) are seated firmly.
- Double-Check Cooling: Again, monitor your CPU and GPU temperatures. If they're hitting critical levels, it's time for a thorough cleaning, improved case airflow, or even replacing thermal paste on your CPU/GPU.
- Test Your RAM: Windows includes a built-in Memory Diagnostic Tool. Search for "Windows Memory Diagnostic" in your Start Menu and run it. If errors are found, identifying and replacing the faulty RAM stick is crucial.
The Screen of Dread: Blue Screen of Death (BSOD)
The infamous blue screen, complete with a cryptic error message, is Windows' way of saying, "Something went critically wrong, and I need to stop before I break completely."
Common Triggers:
- Driver Conflicts/Corruption: A corrupted or incompatible driver is a leading cause of BSODs. This could be for your GPU, chipset, or any peripheral.
- Hardware Failure: A failing component (RAM, hard drive, SSD) can cause system instability leading to a BSOD.
- Memory or Disk Errors: Bad sectors on your storage drive or integrity issues with system memory.
Navigating the Blue Screen:
- Update ALL Drivers: Start with your GPU, then motherboard chipset drivers, network drivers, and any major peripherals. Ensure you're getting them from official manufacturer websites.
- Hardware Diagnostics:
- RAM: Use Windows Memory Diagnostic.
- Storage: Use CrystalDiskInfo to check the health of your hard drives and SSDs.
- If diagnostics point to a failing component, replacement is usually the only option.
- Reinstall Windows (Last Resort): If all else fails, a clean installation of Windows can eliminate corrupted system files, conflicting drivers, and bloatware, giving you a fresh start.
Game Over (Prematurely): Game Crashes to Desktop
You're immersed in the game, and then poof, you're back on your desktop. Frustrating, but often fixable.
What's Happening?
- Software Conflicts: Other programs running in the background might be interfering.
- Insufficient System Resources: Your PC might just be running out of memory (RAM or VRAM) or CPU power to sustain the game.
- Corrupted Game Files: A minor file corruption can often cause a game to crash.
Steps to Stop the Crashes:
- Keep Everything Updated: Make sure both the game and your Windows operating system are fully updated. Developers often release patches specifically for stability.
- Close Unnecessary Background Apps: Revisit Task Manager and aggressively shut down anything you don't need.
- Verify Game Files: Most digital storefronts (Steam, Epic Games, GOG, etc.) have a "Verify Integrity of Game Files" option. This checks for and replaces any corrupted or missing files.
The Blank Screen Panic: No Display on Monitor
Your PC powers on, fans spin, lights glow, but your monitor remains stubbornly black. This can feel like a heart attack for your build.
Potential Culprits:
- Loose or Incorrect Cables: The simplest, often overlooked issue.
- GPU Problems: Your graphics card might not be outputting a signal, or it could be improperly seated.
- BIOS/UEFI Issues: Incorrect BIOS settings or a corrupted BIOS can prevent your system from booting to display.
- Other Hardware Faults: Less common, but other components could be preventing boot. For those interested in assembling their own rig, understanding how to build your own gaming PC can help with component identification.
Troubleshooting Steps:
- Check All Cables: Ensure your HDMI, DisplayPort, or DVI cable is securely connected to both your monitor and your GPU (not your motherboard, unless you're using integrated graphics). Try a different port on your GPU or a different cable entirely.
- Reset Your BIOS/UEFI: Turn off your PC, unplug it, and open the side panel. Locate the small, coin-cell battery (CMOS battery) on your motherboard. Carefully remove it for 5-10 minutes, then reinsert it. This resets your BIOS to default settings.
- Test Your GPU:
- If your CPU has integrated graphics (e.g., Intel CPUs with an 'F' suffix usually don't, AMD's 'G' series do), remove your dedicated GPU and connect your monitor directly to the motherboard's video output. If you get a display, your dedicated GPU is likely the problem.
- If you have a spare GPU, try swapping it in.
- Ensure your GPU is properly seated in its PCIe slot and all power connectors are securely attached.
The Heart of the Visuals: GPU-Specific Troubleshooting and Maintenance
Your Graphics Processing Unit (GPU) is the powerhouse behind your gaming visuals. When it falters, your entire experience collapses.
Deciphering the Signs: Is Your GPU Struggling?
Before diving into complex fixes, know what to look for.
Visual Cues:
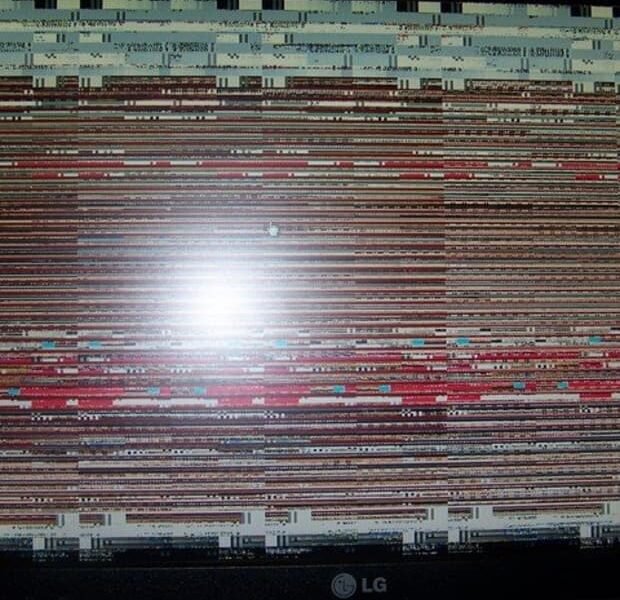
- Screen Flickering/Glitches: Random lines, odd shapes, bizarre colors appearing on screen.
- Artifacts: Pixel distortions, strange textures, or geometric anomalies appearing universally across applications, not just one game.
- Sudden Black Screens: Monitor goes dark unexpectedly, but PC remains on.
Physical/Audio Indicators: - "Jet Engine" Fans: Your GPU fans spinning excessively loud, even at idle.
- Excessive Heat: Noticeable heat emanating from your PC case, or touching the GPU backplate feels unusually hot.
- Burning Smell: This is an immediate warning sign. Shut down your PC immediately if you detect any burning odor.
- Motherboard VGA LED: Many motherboards have diagnostic LEDs. If the VGA light is illuminated, it indicates a problem with the graphics card.
Performance Anomalies: - Consistent Stuttering/Low FPS: Even in less demanding games or at lower settings.
- System Crashes/Shutdowns: Especially frequent during graphically intensive moments.
- Driver Timeout Errors: Specific to AMD cards, indicating the driver crashed and recovered.
- Error Codes: Generic display errors (e.g., "Code 31" in Device Manager).
Keeping Your Cool: GPU Temperature Management
Heat is the enemy of electronics. Managing your GPU's temperature is critical for longevity and stable performance.
Temperature Thresholds:
Generally, a GPU running above 85°C under load is cause for concern. For overclocked GPUs, aim to keep it below 80°C. Prolonged high temperatures degrade components faster.
Monitoring Tools:
Use software like MSI Afterburner, GPU-Z, HWMonitor, or HWiNFO64 to keep an eye on your GPU temperature, clock speeds, and fan RPMs in real-time.
Actionable Steps for Cooling:
- Clean Your PC Regularly: Dust acts as an insulating blanket, trapping heat. Every 3-6 months, power down your PC, unplug it, take off the side panel, and use compressed air to blast dust out of your GPU's heatsink and fans, CPU cooler, and case fans.
- Deep Clean (Advanced): For very stubborn grime, you might need to carefully remove the GPU, disassemble its shroud, and gently clean fan blades with isopropyl alcohol and a soft cloth. Ensure everything is completely dry before reassembly.
- Optimize Case Airflow: Ensure you have a balanced setup of intake and exhaust fans in your PC case. Warm air needs a clear path out.
- Adjust Fan Curves: Using software like MSI Afterburner, you can create custom fan curves that make your GPU fans spin faster at lower temperatures, proactively managing heat before it becomes critical.
- Replace Thermal Paste: After several years, the thermal paste between your GPU die and its heatsink can dry out, reducing heat transfer. Replacing it with fresh, high-quality thermal paste can drastically improve temperatures. This is an advanced task; proceed with caution or seek professional help.
- Underclocking (Quick Fix): As a temporary measure, you can slightly underclock your GPU using MSI Afterburner to reduce its heat output if you suspect overheating is causing instability.
Driver Discipline: Managing Your GPU Drivers
Drivers are the vital link between your operating system and your GPU. Maintaining them properly is fundamental.
The Golden Rules:
- Download from Official Sources ONLY: Never download GPU drivers from third-party sites. Stick to NVIDIA's (GeForce Experience/website) or AMD's (Radeon Software/website) official channels.
- Update Regularly (But Wisely): New drivers often bring performance boosts and bug fixes for the latest games. However, don't blindly update the moment a new driver drops. Sometimes, new drivers introduce new bugs. Read community feedback first.
- Roll Back if Issues Arise: If you update drivers and immediately experience problems (crashes, performance drops), roll back to the previous stable version using Device Manager.
- The Nuclear Option: DDU (Display Driver Uninstaller): For persistent driver issues or when switching GPU brands, DDU is invaluable. It completely removes all traces of previous display drivers, allowing for a truly clean installation. Always run DDU in Windows Safe Mode for best results.
- Consider Driver-Only Installs: NVIDIA GeForce Experience and AMD Radeon Software offer features like game optimization and recording, but some users prefer a "driver-only" installation to minimize background processes and potential conflicts.
- Windows Reliability Monitor: This built-in Windows tool can help track system crashes and software issues, often pinpointing driver-related problems. Search for "Reliability Monitor" in the Start Menu.
The Foundation: Your PSU and GPU Compatibility
A robust PSU is the unsung hero of a stable gaming PC. A weak or failing PSU can manifest as GPU problems, random shutdowns, and general instability.
Ensuring Adequate Power:
- Check Wattage Requirements: Every GPU has a recommended PSU wattage. For example, an RTX 3070 might recommend a 650W PSU, while an AMD Radeon RX 7900 XTX paired with a high-end Intel Core i5 CPU could need an 850W PSU or more. Always account for your entire system's needs, not just the GPU. Online wattage calculators (OuterVision, PCPartPicker) are excellent resources. Always choose a PSU with wattage slightly higher than the calculated recommendation for headroom.
- Dedicated Power Cables: Ensure your GPU is connected with dedicated PCIe power cables directly from the PSU, not daisy-chained adapters or splitters, especially for powerful cards.
- Quality Matters: A high-quality, 80 Plus certified PSU (Bronze, Gold, Platinum, Titanium) offers better efficiency and more stable power delivery. Don't skimp on the PSU.
- Physical Inspection: Verify all PSU cables are securely connected to the PSU and your components. A loose connection can cause intermittent power delivery.
Benchmarking Your Beast: Testing GPU Performance
How do you know if your GPU is performing as it should, or if your fixes are working? Benchmarking.
Synthetic Benchmarks (Raw Power):
- Tools: 3DMark (Time Spy, Fire Strike), FurMark (stress testing), UNIGINE Heaven, UNIGINE Superposition, Basemark GPU.
- Purpose: These tools push your GPU to its absolute limits, measuring raw processing power, identifying bottlenecks, and stress-testing stability. They are great for establishing a baseline or comparing your performance against similar setups.
- Method:
- Close all other applications to ensure the benchmark gets full system resources.
- Run the benchmark multiple times to ensure consistent results.
- Monitor temps, clock speeds, and power draw during the test using tools like MSI Afterburner.
- Save your scores for future comparison.
Real-World Gaming Tests:
While synthetic benchmarks are useful, real-world gaming offers the most accurate picture of your experience.
- Focus on Average and 99th Percentile FPS: Average FPS tells you overall smoothness, but the 99th percentile (the frame rate at which 99% of frames are rendered faster) indicates how smooth your worst 1% of frames are, which is crucial for identifying stutters.
- Consistent Testing: Pick a specific, repeatable section in a game (e.g., a benchmark mode, a specific run through a level) and run it multiple times.
- Monitor In-Game Metrics: Use your GPU monitoring software's overlay (like MSI Afterburner's OSD) to see FPS, temperatures, and GPU/CPU utilization while you play. This helps correlate performance dips with specific hardware stress. You might notice that while a game like Hogwarts Legacy is graphically demanding, understanding these metrics can help you dial in settings for a smooth experience.
The Thrill and Peril: Overclocking Your GPU
Overclocking means pushing your GPU beyond its factory-set speeds for extra performance. It's tempting, but not without risks.
The Upsides: A few extra frames, bragging rights.
The Downsides:
- Reduced Lifespan: Higher clock speeds mean more heat and stress, potentially shortening your GPU's lifespan.
- Voided Warranty: Most manufacturers consider overclocking outside of factory settings as voiding your warranty.
- Instability: Aggressive overclocks can lead to crashes, artifacts, or even system instability.
Precautions for Overclocking: - Start Small: Make tiny adjustments (e.g., +10MHz to core clock, +50MHz to memory clock) and rigorously test stability after each change using benchmarks and real-world gaming.
- Temperature is Key: Never let your GPU exceed its safe temperature thresholds. Enhanced cooling (better case airflow, custom fan curves, even liquid cooling) is a prerequisite for serious overclocking.
- Voltage Control: Only adjust voltage if you know what you're doing. Incorrect voltage settings can quickly damage your hardware.
- Research Your Card: Different GPU models and even different brands of the same GPU can have varying overclocking headroom. Look for guides specific to your card.
- Know Your Limits: Not all GPUs are great overclockers. If you're not getting significant gains without instability or excessive heat, it's often not worth the risk. For maximizing performance efficiently, sometimes upgrading a bottleneck component like your CPU is more impactful. Consider exploring the best budget gaming CPUs if your processor is lagging behind.
Final Thoughts: Staying Ahead of the Curve
Mastering Performance, Graphics, and Technical Issues isn't a one-time fix; it's an ongoing commitment to understanding your hardware and software. By regularly updating drivers, monitoring temperatures, and knowing how to diagnose common problems, you’ll spend less time troubleshooting and more time enjoying your favorite games.
Remember, a healthy PC is a happy PC. Regular cleaning, thoughtful maintenance, and an informed approach to settings will keep your rig running smoothly for years to come. Don't be afraid to experiment with settings, but always back up important data and proceed with caution when making significant changes. Your immersive gaming experience depends on it!